传统机器学习模型(实验性质)#
了解如何使用 Xinference 推理传统机器学习模型。在 Xinference 中,这些灵活可扩展的模型被称为 灵活模型。
Added in version v1.7.1: 该功能自 v1.7.1 版本起公开,目前 API 尚不稳定,可能会在后续迭代中发生变化。
介绍#
传统机器学习模型在以大模型为核心的生态系统中仍然能发挥重要作用。
Xinference 提供了灵活的扩展能力,用于推理传统机器学习模型。它内置支持加载和运行以下类型的模型:
使用 HuggingFace 托管模型的 HuggingFace Pipeline,可用于分类等任务。
使用 ModelScope 上模型的 ModelScope Pipeline,可用于分类等任务。
YOLO 用于图像检测及相关计算机视觉任务。
Xinference 支持多种传统机器学习模型。针对上述每个类别,我们将通过一个代表性示例,逐步演示如何在 Xinference 平台上进行推理。
内置模型支持案例#
HuggingFace Pipeline 模型#
首先,我们以 FacebookAI/roberta-large-mnli 为例。该模型属于零样本分类模型。对于其他类型的模型,注册时只需指定对应的任务(也是 Pipeline 的参数)。
将模型下载到以下路径:
/path/to/roberta-large-mnli
接下来,我们演示如何在 Xinference Web UI 中注册该灵活模型。后续示例中,除非必要,我们将跳过界面操作,专注于核心逻辑。
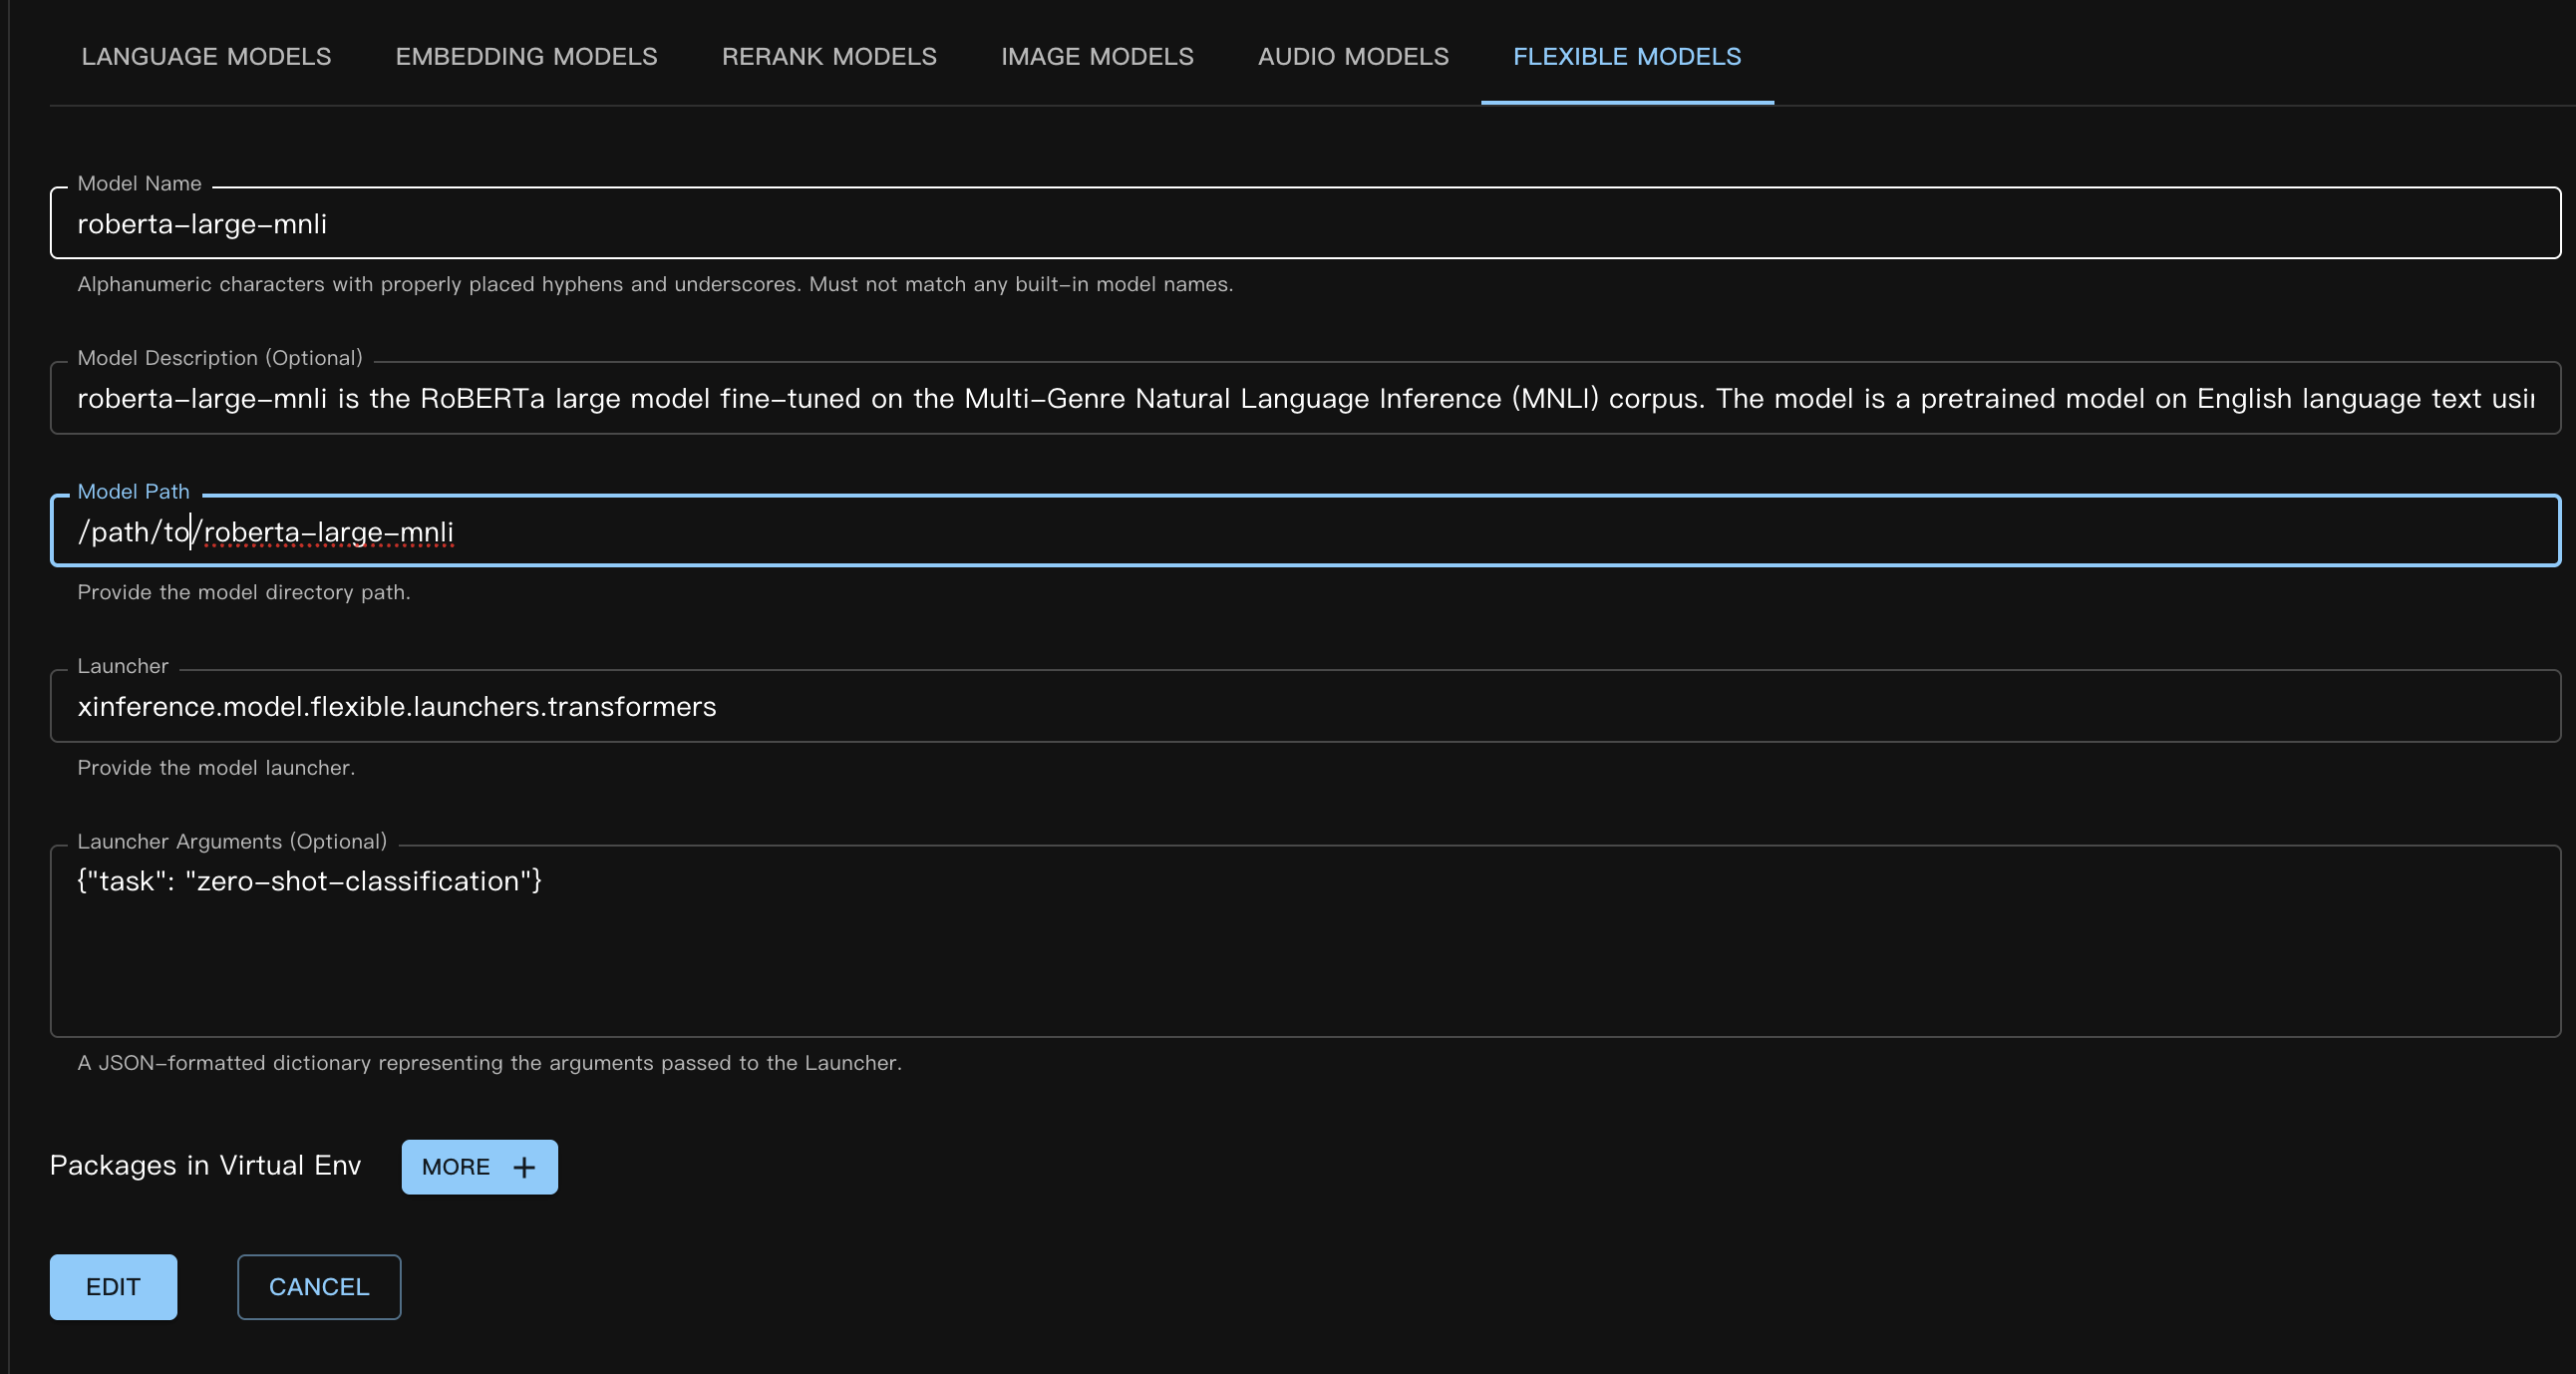
对应的自定义模型 JSON 文件如下:
{
    "model_name": "roberta-large-mnli",
    "model_id": null,
    "model_revision": null,
    "model_hub": "huggingface",
    "model_description": "roberta-large-mnli is the RoBERTa large model fine-tuned on the Multi-Genre Natural Language Inference (MNLI) corpus. The model is a pretrained model on English language text using a masked language modeling (MLM) objective.",
    "model_uri": "/path/to/roberta-large-mnli",
    "launcher": "xinference.model.flexible.launchers.transformers",
    "launcher_args": "{\"task\": \"zero-shot-classification\"}",
    "virtualenv": {
        "packages": [],
        "inherit_pip_config": true,
        "index_url": null,
        "extra_index_url": null,
        "find_links": null,
        "trusted_host": null,
        "no_build_isolation": null
    },
    "is_builtin": false
}
请参见章节 注册一个自定义模型,了解如何通过代码或命令行注册模型。
接下来,在 Web UI 中选择 启动模型 / 自定义模型 / 灵活模型 来加载模型。加载流程与其他模型类型相同。
使用命令行时,请记得指定参数 --model-type flexible。
模型成功加载后,我们可以通过以下方式进行推理。
curl -X 'POST' \
  'http://<XINFERENCE_HOST>:<XINFERENCE_PORT>/v1/flexible/infers' \
  -H 'accept: application/json' \
  -H 'Content-Type: application/json' \
  -d '{
    "model": "roberta-large-mnli",
    "args": [
      "one day I will see the world",
      ["travel", "cooking", "dancing"]
    ]
  }'
from xinference.client import Client

client = Client("http://<XINFERENCE_HOST>:<XINFERENCE_PORT>")

model = client.get_model("roberta-large-mnli")

sequence_to_classify = "one day I will see the world"
candidate_labels = ['travel', 'cooking', 'dancing']
model.infer(sequence_to_classify, candidate_labels)
{"sequence":"one day I will see the world","labels":["travel","cooking","dancing"],"scores":[0.9799638986587524,0.010605016723275185,0.009431036189198494]}
ModelScope Pipeline 模型#
ModelScope Pipeline 模型与 Huggingface 模型非常相似,唯一的区别在于使用的 launcher 不同。
我们以 ModelScope 上的一个零样本分类模型为例。模型为 iic/nlp_structbert_zero-shot-classification_chinese-base。
这里我们使用了 Xinference 的模型虚拟环境功能。因为本示例中使用的模型需要 transformers==4.50.3 才能正常运行。为了隔离运行环境,我们在注册模型时使用了 虚拟环境。
注册模型时指定自定义包的语法与普通包相同,但有一些特殊情况。由于虚拟环境仍基于 Xinference 运行的 Python 解释器的 site-packages,我们需要显式包含 #system_numpy#。包名用 #system_xx# 包裹,确保虚拟环境创建时与基础环境一致,否则很容易导致运行时错误。
注册方式(Web UI):
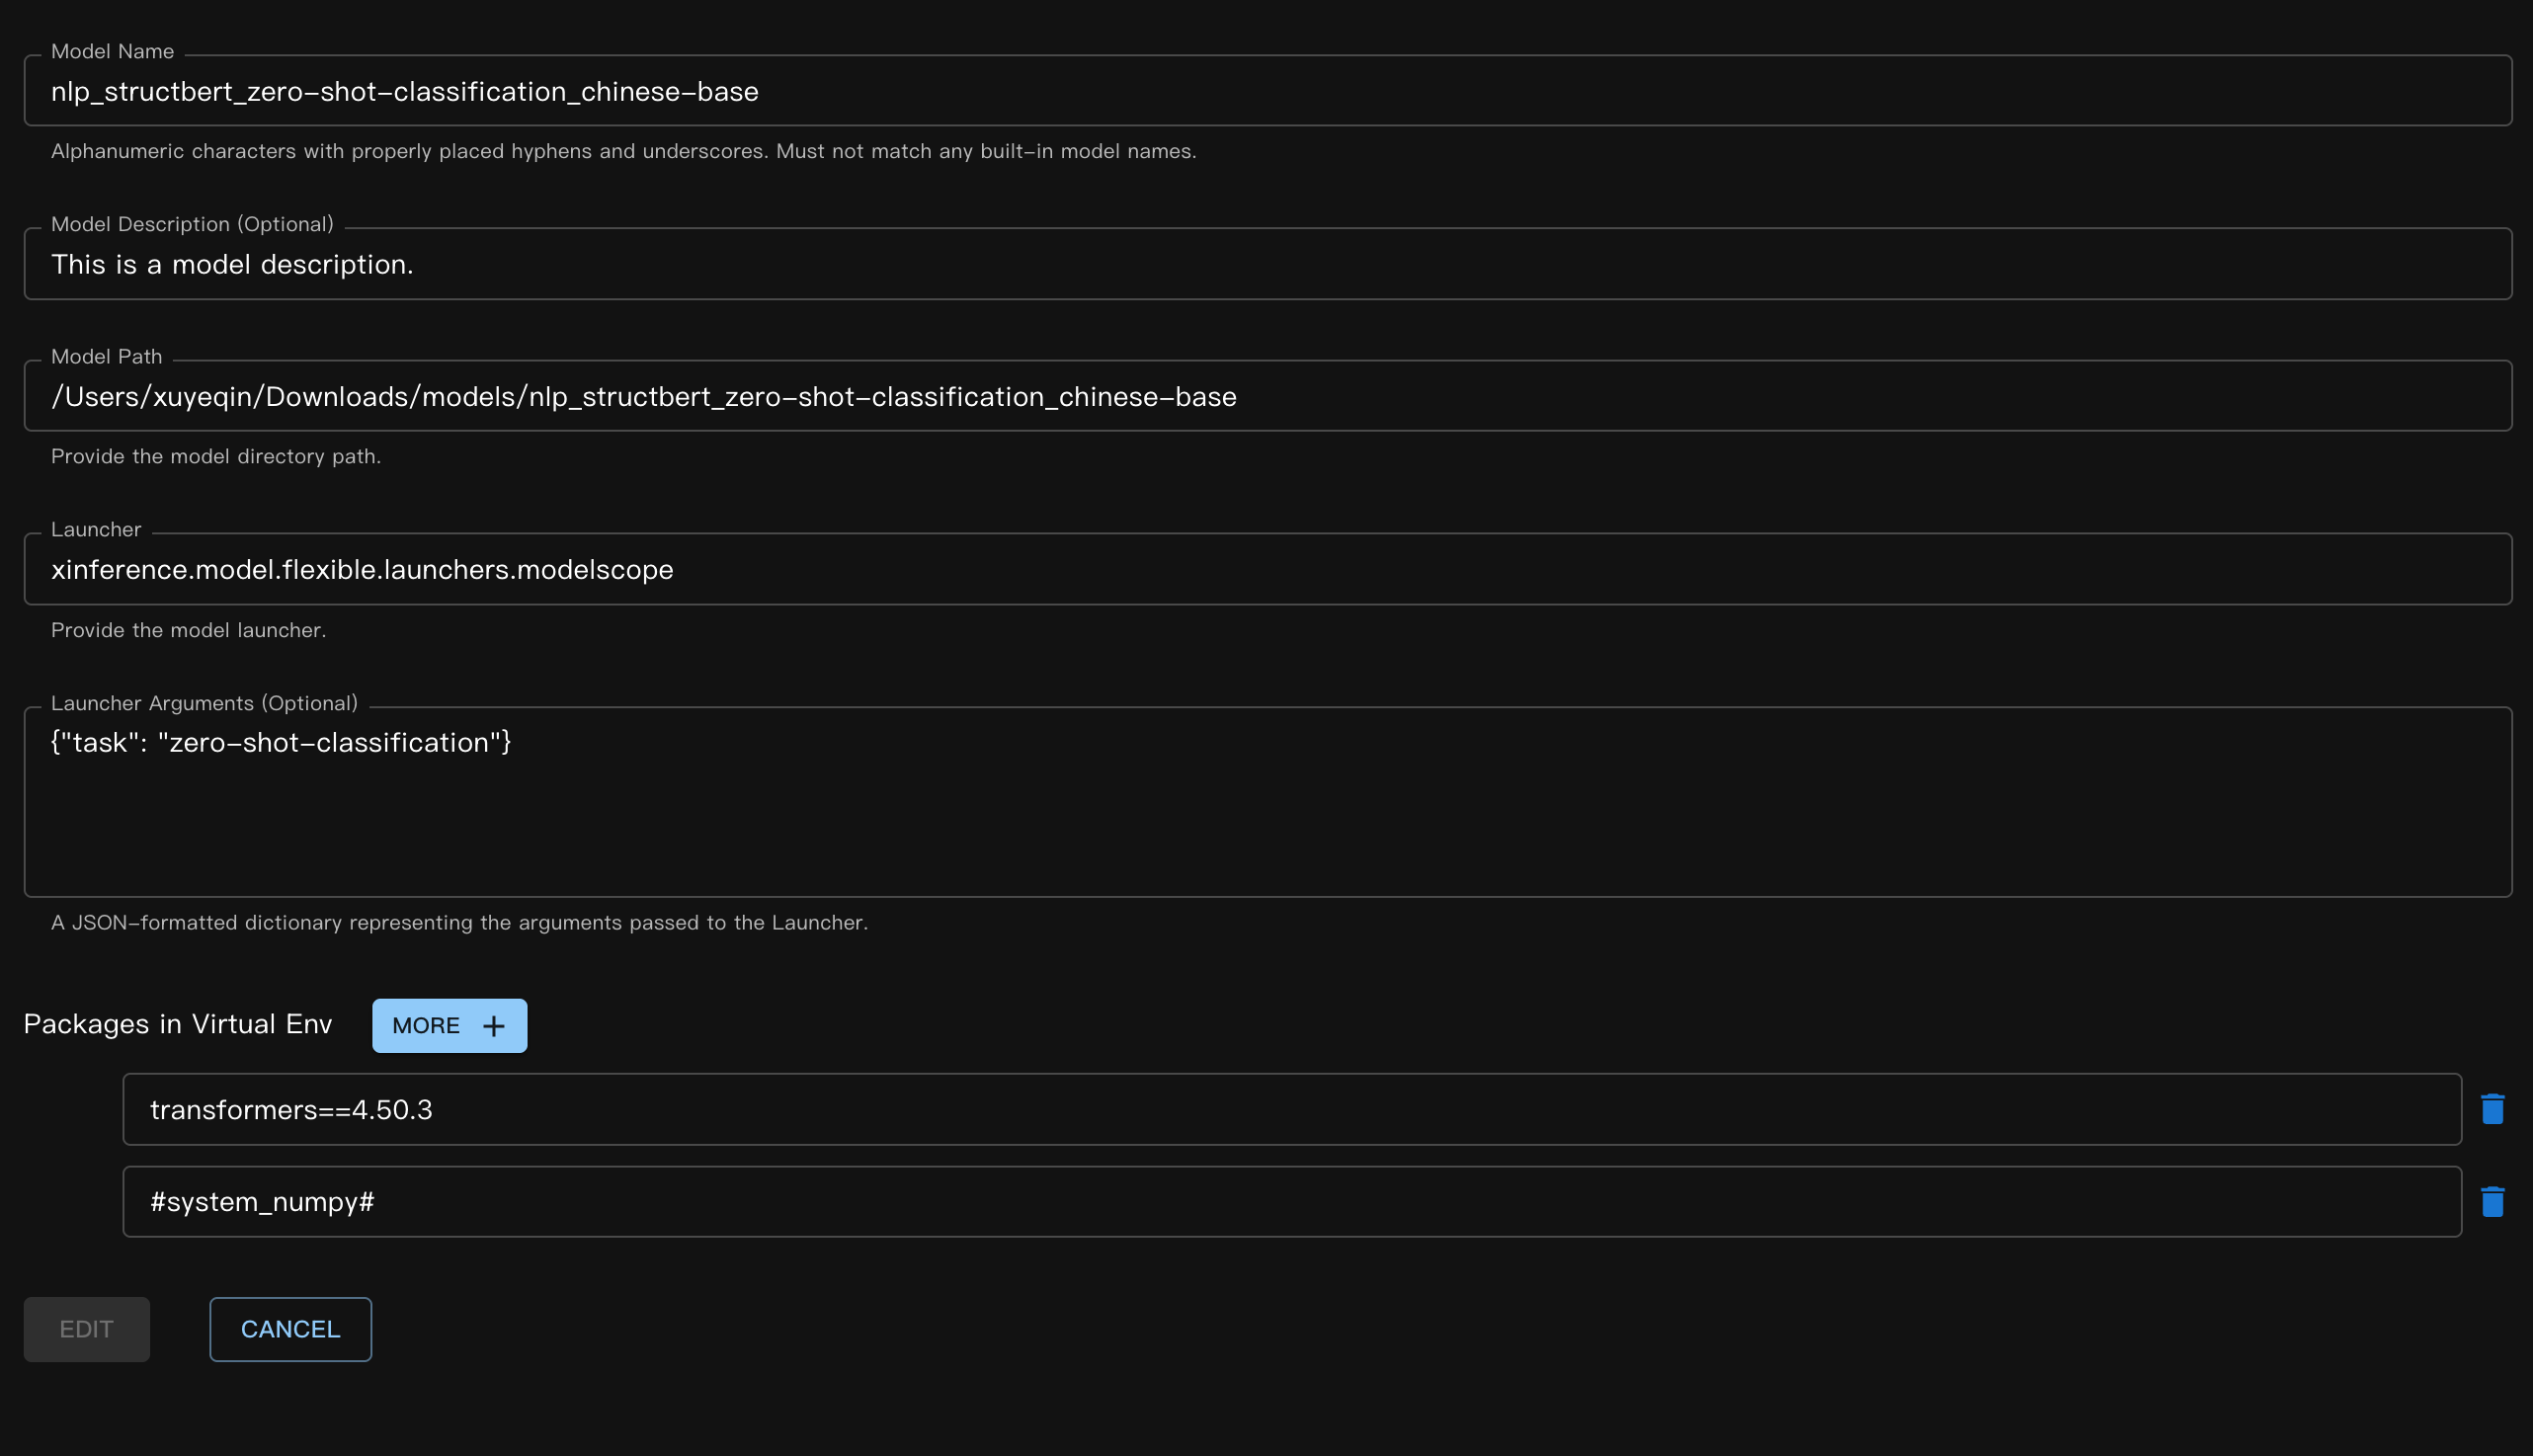
对应的 JSON 文件:
{
    "model_name": "nlp_structbert_zero-shot-classification_chinese-base",
    "model_id": null,
    "model_revision": null,
    "model_hub": "huggingface",
    "model_description": "This is a model description.",
    "model_uri": "/Users/xuyeqin/Downloads/models/nlp_structbert_zero-shot-classification_chinese-base",
    "launcher": "xinference.model.flexible.launchers.modelscope",
    "launcher_args": "{\"task\": \"zero-shot-classification\"}",
    "virtualenv": {
        "packages": [
            "transformers==4.50.3",
            "#system_numpy#"
        ],
        "inherit_pip_config": true,
        "index_url": "https://mirrors.tuna.tsinghua.edu.cn/pypi/web/simple",
        "extra_index_url": null,
        "find_links": null,
        "trusted_host": null,
        "no_build_isolation": null
    },
    "is_builtin": false
}
模型推理:
curl -X 'POST' \
  'http://<XINFERENCE_HOST>:<XINFERENCE_PORT>/v1/flexible/infers' \
  -H 'accept: application/json' \
  -H 'Content-Type: application/json' \
  -d '{
    "model": "nlp_structbert_zero-shot-classification_chinese-base",
    "args": [
      "世界那么大,我想去看看"
    ],
    "candidate_labels": ["家居", "旅游", "科技", "军事", "游戏", "故事"]
  }'
from xinference.client import Client

client = Client("http://<XINFERENCE_HOST>:<XINFERENCE_PORT>")

model = client.get_model("nlp_structbert_zero-shot-classification_chinese-base")

labels = ['家居', '旅游', '科技', '军事', '游戏', '故事']
sentence = '世界那么大,我想去看看'
model.infer(sentence, candidate_labels=labels)
{"labels":["旅游","故事","游戏","家居","科技","军事"],"scores":[0.5115892291069031,0.1660086065530777,0.11971458047628403,0.08431519567966461,0.06298774480819702,0.05538458004593849]}%
YOLO#
YOLO 是一种流行的实时目标检测模型,广泛应用于图像检测和视频分析场景。
首先,下载 YOLO 权重。这里我们以 yolov11s.pt 文件为例。
模型定义的 JSON 文件:
{
    "model_name": "yolo11s",
    "model_id": null,
    "model_revision": null,
    "model_hub": "huggingface",
    "model_description": "YOLO is a popular real-time object detection model, widely used in image detection and video analysis scenarios.",
    "model_uri": "/Users/xuyeqin/Downloads/models/yolo11s.pt",
    "launcher": "xinference.model.flexible.launchers.yolo",
    "launcher_args": "{}",
    "virtualenv": {
        "packages": [
            "ultralytics",
            "#system_numpy#"
        ],
        "inherit_pip_config": true,
        "index_url": "https://mirrors.tuna.tsinghua.edu.cn/pypi/web/simple",
        "extra_index_url": null,
        "find_links": null,
        "trusted_host": null,
        "no_build_isolation": null
    },
    "is_builtin": false
}
模型推理:
import requests
from PIL import Image
import io
import base64
from xinference.client import Client

client = Client("http://<XINFERENCE_HOST>:<XINFERENCE_PORT>")
model = client.get_model("yolo11s")

url = "https://ultralytics.com/images/bus.jpg"

response = requests.get(url)
response.raise_for_status()

img = Image.open(io.BytesIO(response.content))

buffered = io.BytesIO()
img.save(buffered, format="JPEG")
img_bytes = buffered.getvalue()
img_base64 = base64.b64encode(img_bytes).decode('utf-8')

model.infer(source=img_base64)
[[{'name': 'bus',
   'class': 5,
   'confidence': 0.93653,
   'box': {'x1': 13.9521, 'y1': 227.0665, 'x2': 800.17688, 'y2': 739.13965}},
  {'name': 'person',
   'class': 0,
   'confidence': 0.89741,
   'box': {'x1': 669.89709,
    'y1': 389.82065,
    'x2': 809.58966,
    'y2': 879.65491}},
  {'name': 'person',
   'class': 0,
   'confidence': 0.88205,
   'box': {'x1': 52.37262, 'y1': 397.83792, 'x2': 248.506, 'y2': 905.98212}},
  {'name': 'person',
   'class': 0,
   'confidence': 0.8706,
   'box': {'x1': 222.58685,
    'y1': 405.93442,
    'x2': 345.02032,
    'y2': 859.52789}},
  {'name': 'person',
   'class': 0,
   'confidence': 0.66505,
   'box': {'x1': 0.28522, 'y1': 548.60931, 'x2': 81.25904, 'y2': 871.59076}}]]
编写自定义灵活模型#
首先,我们实现了一个用于情感评分的简单自定义 launcher。在此示例中,我们未使用任何实际模型权重,因此 load 函数不执行任何模型加载操作。
# my_flexible_model.py

from xinference.model.flexible import FlexibleModel


class RuleBasedSentimentModel(FlexibleModel):
    def load(self):
        self.pos_words = self.config.get("pos", ["good", "happy", "great"])
        self.neg_words = self.config.get("neg", ["bad", "sad", "terrible"])

    def infer(self, text: str):
        score = 0
        words = text.lower().split()
        for w in words:
            if w in self.pos_words:
                score += 1
            elif w in self.neg_words:
                score -= 1
        return {"score": score}


def launcher(model_uid: str, model_spec: FlexibleModel, **kwargs) -> FlexibleModel:
    # get model path,
    # in this example, we do not use it, so it's empty
    model_path = model_spec.model_uri
    return RuleBasedSentimentModel(model_uid=model_uid, model_path=model_path, config=kwargs)
模型 JSON 定义如下:
{
    "model_name": "my-flexible-model",
    "model_id": null,
    "model_revision": null,
    "model_hub": "huggingface",
    "model_description": "This is a model description.",
    "model_uri": "/path/to/model",
    "launcher": "my_flexible_model.launcher",
    "launcher_args": "{\"pos\": [\"good\", \"happy\", \"great\", \"nice\"]}",
    "virtualenv": {
        "packages": [],
        "inherit_pip_config": true,
        "index_url": null,
        "extra_index_url": null,
        "find_links": null,
        "trusted_host": null,
        "no_build_isolation": null
    },
    "is_builtin": false
}
这里我们通过传入自定义的 pos 值扩展了模型。
最后,我们验证下结果:
from xinference.client import Client

client = Client("http://127.0.0.1:9997")

model = client.get_model("my-flexible-model")

model.infer("I feel nice and am happy today")
{'score': 2}
结论#
Xinference 内置的灵活模型 launcher 可以在 Github 找到,欢迎贡献更多传统机器学习模型的支持!